Sunday, January 29, 2012

Ideas

Have you ever had a million ideas floating around in your head?  I have and do, all the time!  So the only way I know to get them out of my head is to get them down on paper (or in this case, online).  So here is just one of them...


I have a wonderful old cabinet that I had purchased about a year ago for my kitchen which I have been using as a pantry, but now that we are renovating the kitchen, I won't need that cabinet to be used as a pantry any longer.  I want to move it to my family room in the basement to store crafts, puzzles, games, etc.  This is the cabinet in it's current location.


This is how it currently looks on the inside.


I am hoping once we get it into it's new home in the family room, that it will look like this on the inside.  This is a beautifully organized storage cabinet from one of my favourite blogs A Bowl Full of Lemons.


And I was thinking of painting the front inset panels of the doors in chalkboard and/or magnetic paint so that it will look something like this beautiful cupboard from The Inadvertent Farmer.


Well, I can't wait to at least try to make mine look as good as these ones do.  Stay tuned for this and more makeover ideas!

Cheers,
Lisa

Monday, January 23, 2012

Easy Cork Letters

I have always wanted to have letters to hang on the wall in my oldest daughter's room above her bed.  I love the look of the designer wooden letters like these 


but at $16 per letter, I said to myself, "self....there has to be a cheaper way!"


I wanted it to be simple and quick as well as inexpensive, so I decided to take a walk through one of my favourite craft places lately, the dollar store and that is where the plan started to come together.  I decided that cork would be the perfect medium to begin my creation. 


Since my 3 and half year old is into everything "hip hoppy" she calls it, I had to get some inspiration for the design of these letters, so I googled images for funky princess and found these letters as well as the ones above by Rosenberry Rooms...


I loved these, the style was perfect, so the first step was finding a font I liked. I started searching the web for free fonts and downloaded one that caught my eye.  Once it was downloaded I was able to manipulate it however I liked, so I just printed one letter per 8.5 by 11 sheet of paper so that they were a nice size and then each sheet became my template.


From here I used a crafting knife to cut through the paper and the cork.  Remember to use a cutting board or something underneath your cork.


I like the look of the void space in the cork as well, so I may end up using that for something else, but for now I am left with the first letter.


The cork doesn't seem to cut really smooth or it could be that I didn't have the sharpest blade, anyway once it is painted and hung you really can't see the imperfections from a distance.  Once I had all my letters cut out I layed them out to make sure I liked the font and the size.


Not too bad for 30 minutes of work...if I do say so myself.  At this point the project is half finished, now comes the fun part - the painting!  I started by priming them all white.


I let them dry overnight but it wouldn't really be necessary to wait that long.  Then I just took my little artists brushes and my paint and started creating different patterns on each one until I ended up with this...


and this...


and this...


While I was painting my daughter decided that she wanted to help and although I can be picky about these things I felt that I needed to let her express her creativity since they are for her room.  Here are the ones that she did.


Pretty good, I would say!


After all the painting was complete and they were good and dry, I did a dry run of the layout on the wall above her bed by using painters tape and attached them where I wanted them.  Then, since they are so light all I needed to attach them to the wall was 3M Command Poster Strips.
These strips will keep the letters firmly in place, but when we do want to remove them it won't destroy the wall.


Here is the final result...


I love it! 


Here is a breakdown of the cost:


Paper template - free
Cork - 2 packages of 2 sheets from the dollar store $4
Pink, black and white acrylic paint - on sale at Michaels 2 for $1 = $1.50
3M Command Poster Strips - $2.99


Total Project Cost $8.50 


The great thing is that I have lots of paint left as well as the mounting tape, so all I need is some more cork and I can make all the cork letters that I want.


Do you have a simple, inexpensive project you would like to share?  I would love to hear about it.


Cheers,
Lisa

Thursday, January 19, 2012

Mudroom Dreams Fulfilled

When last we met I told you all about my dreams of a fabulous mudroom, one that the kids could walk into and put their coats and shoes and bags away, one that hubby and I could have a place to keep our shoes and especially to have a storage and landing space...and if that's not enough, I also would like it to look pretty.


Well.......I think I did it!


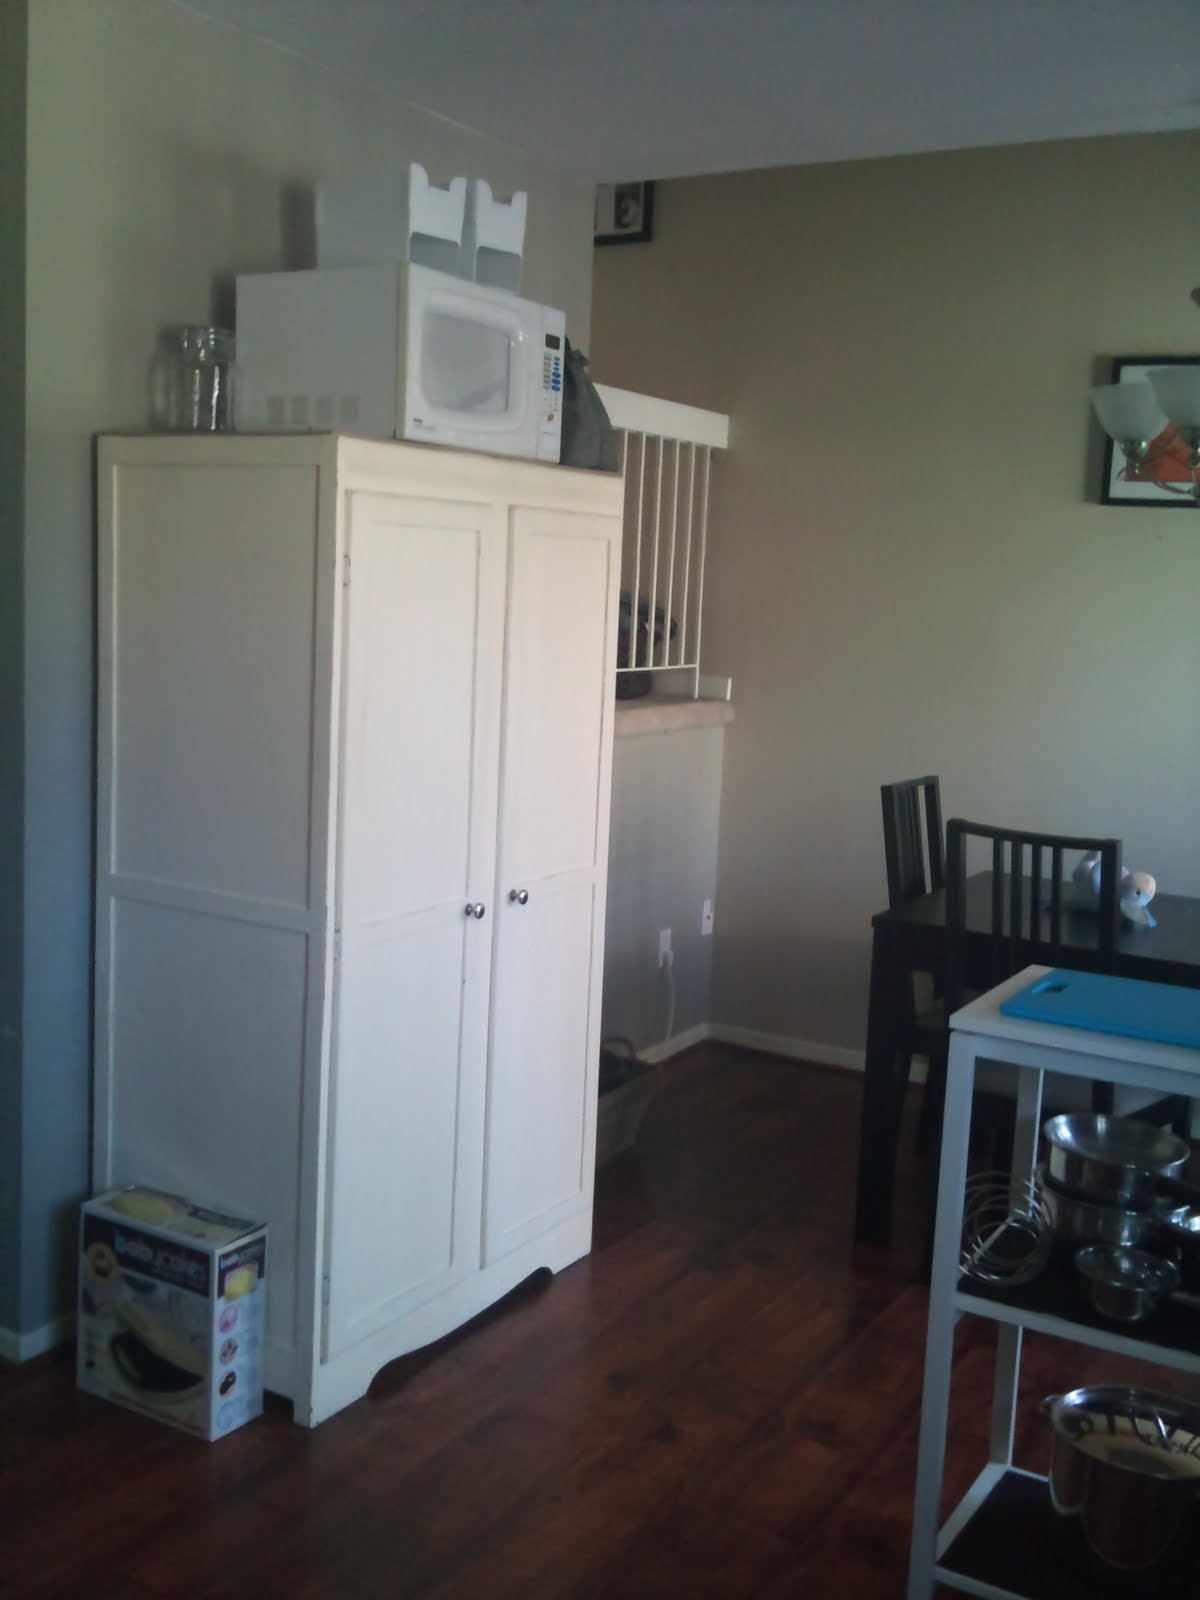
The first step was to come to the realisation that my entry way was not going to cut it.  There was very little that could be done with that space that I hadn't already done.  Here is a reminder of what it looked like.


The next step was to determine the location of said mudroom. There are not a lot of choices and I didn't want it to be too far from the door.  This brings me to this space...


The living room is just off to the right in the photo and to the left is the kitchen.  I think this space was originally intended to be a dining area but it is really too small to be a functional dining room so we have never really had a purpose for it, it is just wasted space....(insert light bulb here). 

What a perfect spot for a mudroom, just steps from the front door and it would finally give this space a purpose.

So, hubby and I started talking about what we would want in the space, I wanted an Ikea shoe cabinet.  This one to be exact...
...and hubby?  All he wanted was to not be able to see the mudroom.  I couldn't believe it! I had great vision about how beautiful it would look.  Alas, I gave him the benefit of the doubt due to the fact that it shares space with the living room.  

Now the question becomes, how do we now divide this space so you can't see the kid's coats and boots?  I was thinking along the lines of a bookshelf like this Ikea Expedit one...
...but hubby wasn't convinced, he thought there should be an actual wall.  I didn't want the space to feel so closed in and wanted it to feel a bit more translucent, so to speak.  So, he actually came up with this idea.
Curtain panels.  I have to admit, I was pleasantly surprised.  So we went shopping and spent a weekend or two putting it all together and this...is the final result.


We started with the shoe cabinet I mentioned earlier and built the rest of the room from there.  I knew I wanted a bench...


I really liked this one because it had additional shoe storage and it was a great size.  I also knew I wanted a coat rack for the kids...


We had a bit a trouble installing it so that it was good and strong, so hubby put a panel behind it that it could be attached directly into the studs with the rack on top, but we haven't had a chance to paint it yet.  I love the coat rack because the kids can (and actually do) hang their coats/bags on it.  Also, it has a shelf for a basket for hats and mitts and a place where I can keep storage containers for their artwork that they bring home in droves.  

Once we got those things up there was this big gap between the shoe cabinet and the wall. What to do?  I thought about just keeping the vacuum there, but that just looked messy and weird, then hubby had another great idea. (I know right?)  So we measured the space and determined that a billy bookcase would fit perfectly. We decided to add doors that were half solid and half glass so that it kept the space looking light but still had some closed storage.


Then, because there wasn't room to add a coat rack higher up for grown ups, hubby went one further for me and did this...


Yep, he put a simple coat rack behind the door for us to use on an everyday basis, but it is also perfect for guests.  We don't need to clean out the closet for guests or have them throw their coats on the stairs, they can just hang them here.  There is still enough clearance for the door to fully open as the coat rack is very low profile.

Here is one more look at the before and after.


So there you have it, a mudroom of my dreams that is both beautiful and functional and the best part -  it is in my very own small space.  

Have you ever had a vision of a space that has come to fruition?  If so, I would love to hear about it.

Cheers,
Lisa

Wednesday, January 18, 2012

Mudroom Before...

So, I don't really have a mudroom Per Se, although I have longed for one that has tons of beautiful built in storage and places to sit and a laundry room maybe, like this one (drool)....

Alas, the size of our little town home does not allow for such luxuries.  What is one to do when you have 2 growing children and 2 adults in a home with an entry area that looks like this...


Or like this...


I know right?  It's horrible.  The closet is tiny, the stairs are in your face when you walk in the door and there are exactly zero walls to set a cabinet or table against.  This area has been my biggest pet peeve for as long as we have owned the house, but now since having kids, it is even worse.


What to do?  Well, I have a plan...but you will have to come back tomorrow to see the result.


Cheers,
Lisa

Monday, January 16, 2012

Girl's Rooms

One of the many projects that I have undertaken in order to get this house to work for our family was to update the girl's bedrooms. The baby needed to move out of the crib and into a big girl bed and we needed to figure out a solution for my oldest to have a bed that works for her but also doubles as a guest bed. We researched all the different options...
like these Ikea bunk beds...
...these are so cute and they come apart to make 2 beds and since her room has a dark Ikea dresser and bookshelf this would work perfectly.  The only problem is...not very practical for guests and since my oldest currently has a twin bed that will be moving to the baby's room it still doesn't give us a great option for when my parents stay over.  I can just picture my dad trying to climb onto that second bed...Oiii!

Another option, again from Ikea was this lovely number...

...this was a great idea because it is super flexible, not only does it have great storage capacity with those drawers, but it can be a day bed like this or a sofa or you can pull out the whole drawer section and there is another mattress that pulls up and turns the whole bed into a double! I loved this idea, however I had 2 problems with this.  The first is that it was relatively expensive for the frame plus I would have had to buy 2 mattresses.  The second problem was that I already had a lovely dark wood headboard from that expensive convertible crib that I had bought with the plan that someday it would be used for a double bed.

Therefore I was left with only one option, which I truly think is the best option since it solves all of our problems.


Yes, a simple 'ol double bed attached to that headboard from the crib.  These are my 2 little monkeys, checking it all out mid move.  So the mattress was donated to charity and the remainder of that precious crib that my little ones spent the first couple of years of their young lives in was tossed out in the trash ;(

Ok...ok...enough sappiness, can you tell I am not one to hold onto things just because they are sentimental?  Anyway... on to the little one's room.  The cute white Ikea Hemnes twin bed was moved out of the big girl's room and into the little girl's room.
She loves it and I love that it was an easy transition.  We also repainted her room in this soft purple and then a pop of colour on the closet doors with the paint and decals to go with her quilt.  I still have some curtains and light fixtures and pictures to put up in each of their rooms, watch for some of these items to appear as projects in the next few weeks.

Anyone else had a similar kind of dilemma in choosing the right investment pieces for your family?

Cheers,
Lisa

Saturday, January 14, 2012

Kitchen Reno Update


Since last time I posted about my kitchen reno, we have made some changes....big surprise right?!  We are no longer using the fancy designer and reconfiguring our powder room, the expense just didn't justify itself.  Instead we decided to keep our current layout (for the most part) there will be a couple of surprises when I post the final result, but other than the layout pretty much everything will be different.  New cabinets, flooring, back splash, sink, counter tops and appliances.  Yes, aesthetically it will be much more pleasing but we are also adding more storage and more functionality - like full reach corner cabinets...YAY.  It's amazing how the little things can be so exciting!  


Anyway, here is a reminder of what my kitchen looked like before


.....and here is a sneak peek at some of the finishes we will be using...


This will be the flooring, it is a porcelain tile from Regal Tile in the colour Royal Crema.  Our tiles however will be 12" by 24", which I think is a really great look.


And the Piece De Resistance - my back splash.  This is my splurge item, it is Travertine Limestone by  Regal Tile.  I can not even wait to see this on the wall!
These will be our cabinets - they are Fabritec Expressive Helios in the colour Autumn Brown.  Love them!
Ahhh....these are my counter tops.  No, they are not quartz they look like they are, don't they?  They are actually Formica laminate.  I love these counter tops, we have had them in the past, you will see them in the pictures above and they are amazing, so durable and beautiful and a lot less expensive than the real thing.


Well, I can't wait.  We will probably begin the demo around the end of February.  Stay tuned as I will be updating you along the way.  Inside the world of a real life renovation, not the kind you see on TV that's done in a day.  


Cheers!
Lisa

Tuesday, January 10, 2012

Old Furniture...New Room

So, where do we begin....I guess the best place to start is where we left off - the elephant in the room...literally...the armoire.  Great news, I never had to make that big decision of whether to repurpose it because it sold on Kijiji very shortly after my last post.  Yay!  It was a great piece but way too big for my house and with the way that I like to move furniture around, it just wasn't practical for us.


Where does this leave us? We have a beautiful new flat screen tv, no armoire and a buffet that has been moved from the kitchen to the living room.  


So, here's what we did.


The buffet top was removed, we packaged all the glassware that was in it into a tote for the time being as we are doing a kitchen reno which will accomodate it in a couple of months.  One major concern with this idea is, what do we do with the top half of the buffet.  It is a good storage piece and I really don't want to throw it away because some day I might want it as a full unit again.  I am a huge fan of upcycling furniture and reusing it in different rooms and in new ways and it is a beautiful solid wood piece from Ikea.  It is almost 10 years old and looks as great today as the day we got it.


Here is a look at how we repurposed the bottom part for our beloved new television.


And this is our first attempt at using the top portion on it's own....by the way...this was the hubby's idea (shhh, don't tell him I told you).


It didn't really work, it just became a wide open dumping ground.  The storage part was great as it held craft supplies and cookbooks but obviously this just would not do, so we moved it to the laundry room where I am currently in the process of trying to create a craft/studio space, though I'm not too sure that is going to work out since the space is unfinished....sigh....I digress.  


As for that messy space above, more about that to come in future posts so stay tuned for a major transformation.


By the way does anyone have any great solutions for the empty expanse of wall above the tv? 

Monday, January 09, 2012

I'm Baaaack!

Well, I know it has been a while.  I really have no excuse for not staying current but things seemed to get crazy all at once.  Changes at work, the holidays and projects galore have kept us busy for the last few months.  Anyway, I am back and I have lots of things to share with you!


Here is a peek at topics to come: 
What happened with the old armoire?  


Girl's rooms redo


Mud room creation


Kitchen Reno update


Projects: Easy name letters
               Light fixture makeover
               Picture frame makeover